Install TortoiseSVN
1. Download TortoiseSVN from following link ( download the latest stable release of TortoiseSVN)
http://tortoisesvn.net/downloads.html

1. Click and run the downloaded file, continue the installation process

Using TortoiseSVN client on Windows
Verifying Installation:
In order to verify the successful installation of the Tortoise SVN client right click on any folder and you can see the TORTOISE SVN TASKS as shown below:

Check out from SVN Repository:
Step1: create the folder where you want to check out the files/folder from SVN server repository.
Step2: right click the folder and click on SVN Checkout. Now you can see the screen like Figure 1.
Figure 1: SVN Check out screen
Step 3: In above picture Figure 1. URL is the SVN server repository url to access the files and the Checkout directory is the directory where you are going to download (checkout) the files. After specifying the url and directory click OK.
Step4: After step 3 you may be asked for your SVN username and password. Enter the valid username and password and proceed.
Step 4: now you can see the files checkout from the SVN server repository as shown below figure 2
Figure 2: checkout from svn screen
Configuring TortoiseSVN
TortoiseSVN generally requires no configuration. To access a repository, a checkout operation should be performed. Right-click in the directory to perform the checkout, and select 'SVN Checkout' from the menu. Then, access the repository via URL, similar to how a web-browser operates. This URL will look like:
https://PROJECTNAME.svn.sourceforge.net/svnroot/PROJECTNAME
Though, typically you would want to specify the trunk to be checked out. Like this:
https://PROJECTNAME.svn.sourceforge.net/svnroot/PROJECTNAME/trunk
PROJECTNAME is the project UNIX name, as specified on the summary page for the project in question. The project, 'filezilla', for example, would use the following URL to checkout the trunk of their SVN repository:
https://filezilla.svn.sourceforge.net/svnroot/filezilla/trunk
Upon first connection to the SourceForge.net SVN server, you may be prompted to accept the 'server certificate' for svn.sourceforge.net, you should 'Accept Permanently' the certificate.
After initial checkout, if you change a file and want to commit the change back to the repository, you will be prompted for your username and password. This will be the username and password for the SourceForge.net website.
Example:
Integrating TortoiseSVN client on STS (subclipse)
1. Open STS -> click on Help

2. Click ->Install New software

3. Click Add Button and screen blow is dispalyed
Name : trotoiseSvn
Location: http://subclipse.tigris.org/update_1.10.x
For further information visit
http://subclipse.tigris.org/servlets/ProjectProcess?pageID=p4wYuA

4. STS automatically downloads all the required plugins, after that restart the STS and refer to section below for the tips to operate the plugin.
Opearating subclipse from STS
1. Right click on Project Explorer and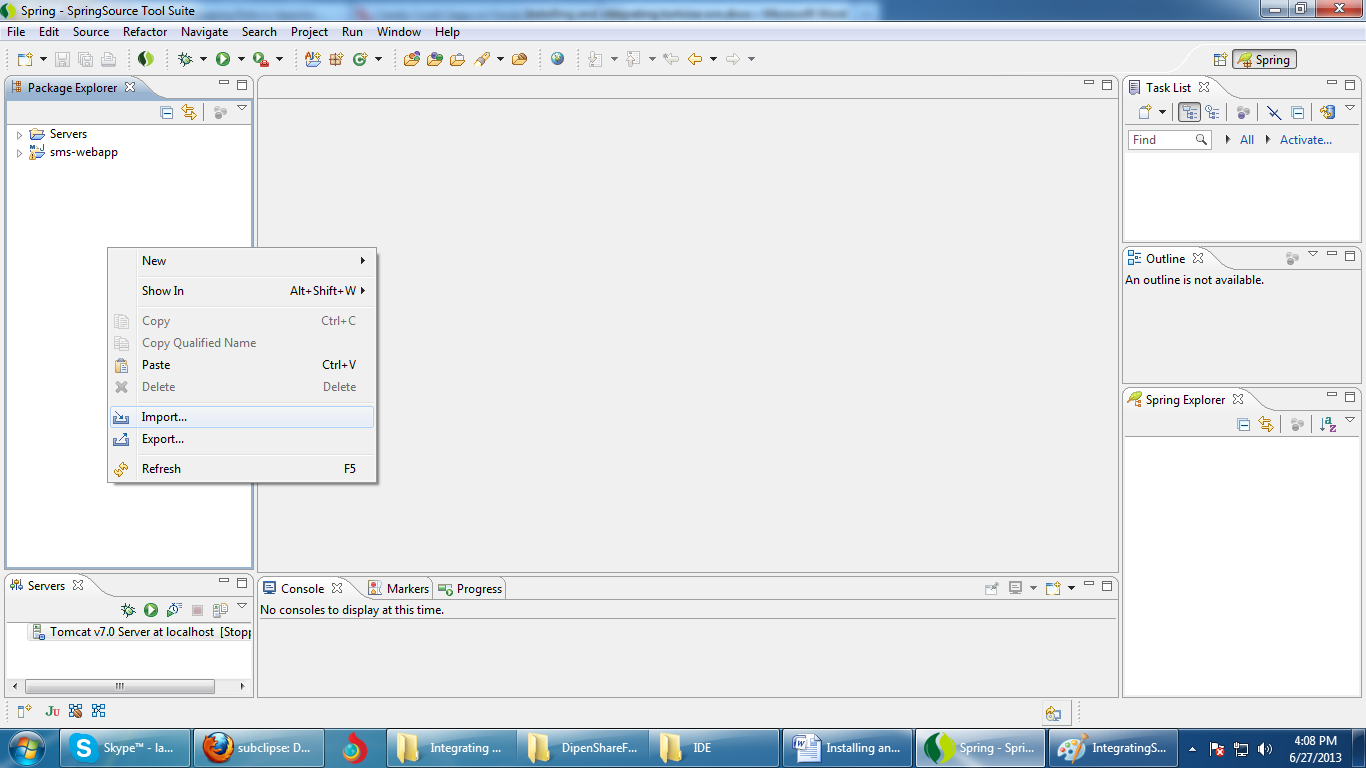
2. click -> Import

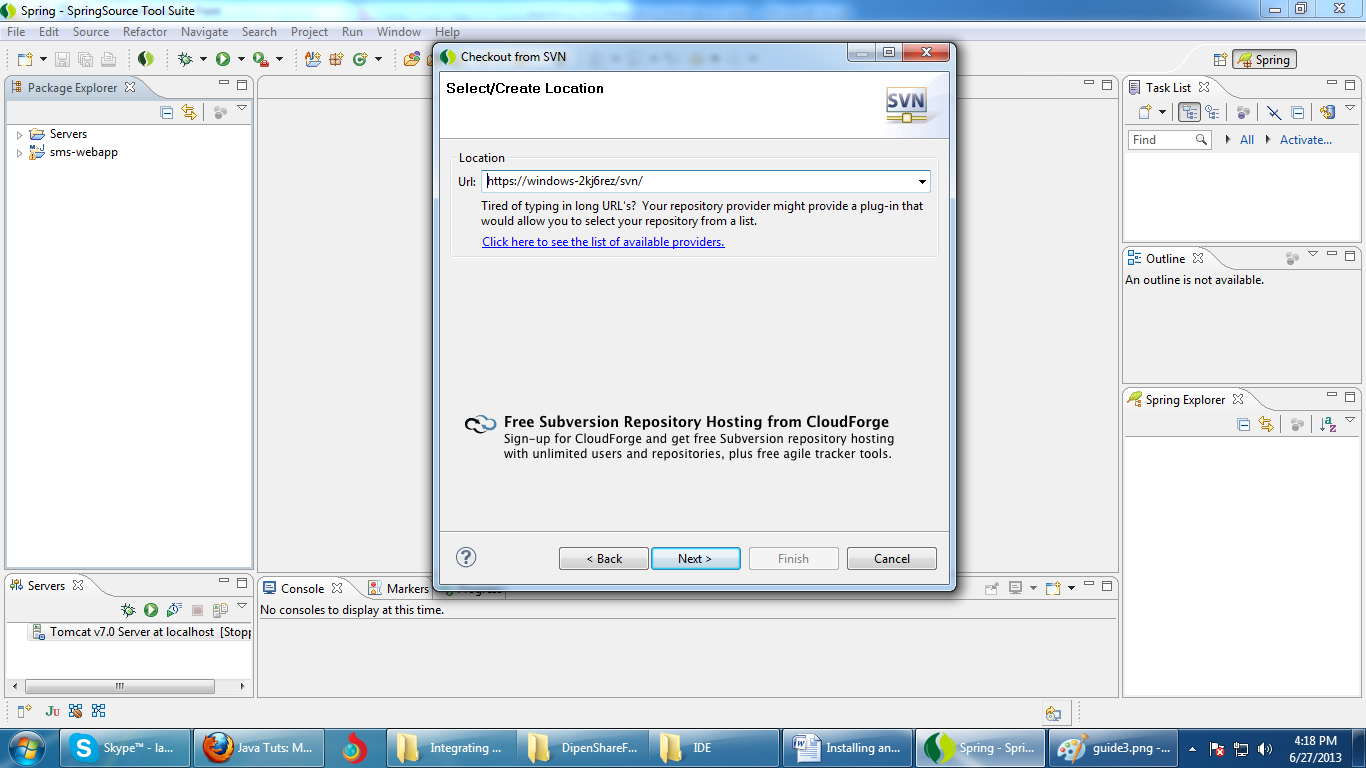
3. Choose SVN menu and click -> checkout Projects for SVN -> Next Button
4. If its first time select first option then -> Next Button
Provide the link of your SVN server -> Next Button
i.e. my current server location is https://windows-2kj6rz/svn/
Else you are provided with list of projects from previous server setting and choose a project to work on.
5. After that following screen will be displayed, choose appropriate folder and project you want and click -> Next Button
6. If you want further setting modify as you need, but for our purpose default is alright thus -> Finish Button
No comments:
Post a Comment